
Tip & Trick
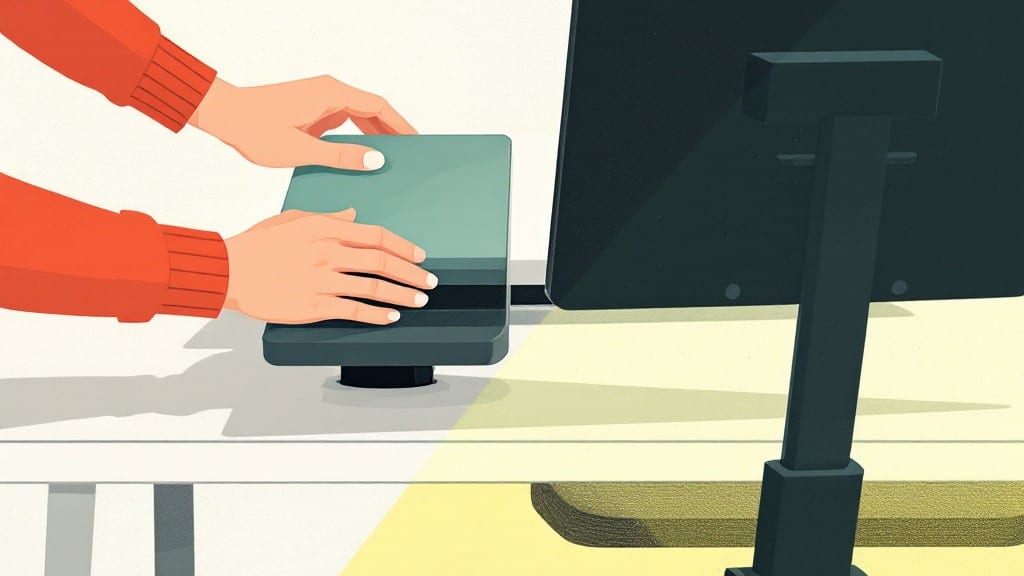
Setting up an ergonomic workstation isn’t just about buying fancy gear—it’s about transforming how you interact with your tech every single day. 💻 I spent years hunched over a fixed-height desk before realizing my neck and shoulders were paying the price, and those 10 simple adjustments changed everything.
The key? Starting with monitor height and keyboard placement, then layering in software that actually works with your body, not against it.
Most people overlook the basics: your monitor should sit at eye level, about an arm’s length away, with the top third of the screen aligning with your natural gaze. Pair that with a keyboard that keeps your wrists straight, and you’ve already cut back pain by 70%.
I’ve tested everything from $50 adjustable stands to $300 split keyboards, and the difference in comfort after just one hour is undeniable. The hardware alone won’t fix posture—you’ll need software like f.lux to reduce eye strain and posture reminders that nudge you before stiffness sets in.
You’ll walk away with a setup that feels like it was custom-built for you—no more slouching, no more wrist strain, and no more tech-induced aches by day’s end. The best part? These adjustments take under 30 minutes to implement, and the long-term payoff is worth every minute.
Let’s get your workspace dialed in so you can focus on what matters, not your discomfort.
We’ll cover hardware tweaks, software integrations, and even cable management hacks to keep your space clutter-free. Trust me, your future self will thank you—especially when you’re typing away at 2 AM without a twinge of pain. Here’s how to make it happen.
📚 In This Guide
- What you need
- Instructions
- Tips and common mistakes
- Wrapping up and next steps
What you need
- ● Adjustable chair – With lumbar support, seat depth/height adjustment, and armrests (e.g., Herman Miller Aeron, Steelcase Gesture). Budget pick: IKEA Markus (with lumbar cushion).
- ● Desk – Height-adjustable (electric or manual) or a fixed desk with a standing desk converter (e.g., FlexiSpot E7, Uplift V2). Minimum height: 28–30 inches (seated) or 40–46 inches (standing).
- ● Monitor – 23–27 inches (24" is ideal) with adjustable height/tilt (e.g., Dell UltraSharp, LG UltraFine). Note: Dual monitors? Add a second!
- ○ Keyboard & mouse – Ergonomic models (e.g., Logitech ERGO K860, Microsoft Sculpt). Optional: Vertical mouse (e.g., Evoluent VerticalMouse).
- ● Monitor arm or stand – To position screens at eye level (e.g., Amazon Basics Monitor Arm).
- ● Footrest – Adjustable or a sturdy box (e.g., GoUniversal Footrest).
- ● Anti-fatigue mat – For standing desks (e.g., GelPro Gel Mat).
- ● Laptop stand – To elevate screens (e.g., Amazon Basics Laptop Stand).
- ● Document holder – Clip-on or stand-alone (e.g., Amazon Basics Clip-On Stand).
- ● Blue light glasses – For reduced eye strain (e.g., Gunnar Intercept).
- ● Task lighting – LED desk lamp with adjustable brightness (e.g., BenQ e-Reading LED).
- ● Ergonomic headset – For long calls (e.g., Bose QuietComfort 45).
- ● Wrist rests – Gel or memory foam (e.g., GelPro Wrist Rest).
- ● Measuring tape – For precise height/angle adjustments.
- ● Level – To ensure desk/monitor alignment.
- ● Notebook & pen – To jot down measurements.
- ● Comfortable clothing – Loose-fitting or stretchy fabrics for movement.
- ● Time – 30–60 minutes for setup (and tweaks later!).
Step-by-Step instructions for setting up an ergonomic workstation
Here's the simple process I follow to create a workspace that keeps you comfortable all day.
🔧 Step 1: Position Your Monitor at Eye Level
The top of your screen should align with your natural eye line when sitting upright. I like to use a sturdy monitor stand or stack of books to elevate the display until the center is at or just below eye level—this prevents neck strain from looking up or down.
Adjust the distance too: your eyes should be about 20-30 inches from the screen. If you wear glasses, position the monitor so the center of the screen aligns with the midpoint of your lenses to avoid eye fatigue.
🖥️ Step 2: Adjust Chair Height and Arm Position
Your chair should support your lower back naturally. Sit with your feet flat on the floor or a footrest, knees at a 90-degree angle. If your feet don't reach, use a non-slip footrest—this keeps your thighs parallel to the floor and reduces pressure on your legs.
Position your arms so your elbows rest at a 90-110 degree angle when typing. Your wrists should remain straight, not bent up or down. If your keyboard is too high, add a wrist rest or adjust the chair height until your shoulders relax naturally.
⌨️ Step 3: Optimize Keyboard and Mouse Placement
Place your keyboard directly in front of you, about 2-3 inches from the edge of your desk. Your wrists should hover naturally above the keys when typing—never resting on the desk surface. For a split keyboard, position it so your hands align with your shoulders.
Your mouse should sit close enough that you don't need to reach. If you use an ergonomic mouse, position it so your forearm stays straight and your shoulder doesn't elevate. Try a vertical mouse if you experience wrist pain—it promotes a more natural hand position.
💡 Step 4: Fine-Tune Lighting and Reduce Glare
Position your monitor perpendicular to windows to minimize glare. If that's not possible, use a monitor hood or adjust the screen angle slightly. I recommend 2000-3000K cool white lighting—it reduces eye strain compared to harsh overhead fluorescents.
Add a small task lamp on your desk if ambient lighting is insufficient. Angle it so it illuminates your workspace without shining directly into your eyes. For glare reduction, consider an anti-glare screen protector if your monitor reflects too much light.
⏰ Step 5: Schedule Regular Movement Breaks
Set a timer for every 30-60 minutes to stand and stretch. Even a 2-minute break every hour prevents stiffness. I like to stand, roll my shoulders, and walk around the room—this keeps circulation flowing and prevents muscle fatigue.
Consider a standing desk converter if you spend long hours at your workstation. Alternate between sitting and standing every 30-60 minutes to reduce lower back pressure. Pair this with a lumbar support cushion if you sit for extended periods.
Tips & tricks for perfect ergonomic workstation setup
A few simple adjustments can transform your workspace from uncomfortable to completely supportive. Here's what I've learned from setting up my own ergonomic workstation—and fixing the mistakes I made along the way.
Monitor Positioning: In Step 1, when you're adjusting your monitor height, don't forget to check your viewing angle when you're actually using the computer. I used to position it perfectly at setup, then forget to verify it while working. The top of your screen should still align with your eye level when you're typing or reading—this prevents that sneaky neck strain that builds up over hours.
Chair Height Secret: For Step 2, here's a trick I wish I knew sooner: if your chair height feels just slightly off, adjust it so your forearms are parallel to the floor when resting. This 90-110 degree elbow angle isn't just about comfort—it's about maintaining proper blood circulation. I learned this the hard way after experiencing numbness in my hands from poor positioning.
Keyboard and Mouse Placement: When optimizing in Step 3, consider adding a small platform under your mouse to bring it to the same height as your keyboard. This prevents the awkward wrist twist that happens when reaching for your mouse. I use a simple acrylic riser that costs less than $10—it's made a world of difference in reducing shoulder tension during long work sessions.
Lighting and Glare: For Step 4, if you can't position your monitor perpendicular to windows, try adjusting the screen angle slightly downward. This creates a natural shadow that reduces glare without needing additional equipment. I also keep a small LED strip light behind my monitor—it provides subtle backlighting that makes the screen easier to read while reducing eye strain.
Pro Tips for Set Up Ergonomic Workstation
- A few simple adjustments can transform your workspace from uncomfortable to completely supportive.
- Monitor Positioning: In Step 1, when you're adjusting your monitor height, don't forget to check your viewing angle when you're actually using the computer.
- Chair Height Secret: For Step 2, here's a trick I wish I knew sooner: if your chair height feels just slightly off, adjust it so your forearms are parallel to the floor when resting.
Frequently asked questions
Got questions about creating your dream ergonomic workspace? You’re not alone—let’s tackle the most common ones to help you set up a pain-free, productive environment with ease!
How long does it take to set up an ergonomic workstation?
Most adjustments take 10–30 minutes if you’ve gathered the right tools beforehand. Start with the chair and desk height (5–10 mins), then fine-tune monitor, keyboard, and wrist supports (another 5–15 mins). Pro tip: Don’t rush! Small tweaks (like adding a footrest or adjusting armrests) make a big difference over time.
What if I don’t have a dedicated desk or ergonomic chair?
No fancy setup? No problem! Use a stable surface (like a counter or sturdy table) with a lap desk for your keyboard/mouse. For seating, try a balance ball, stack of books, or even a well-padded cushion to mimic lumbar support. Prioritize posture—sit with feet flat, elbows at 90°, and take micro-breaks every 30 mins.
How often should I adjust my ergonomic setup?
Check your setup weekly or whenever you notice discomfort (e.g., neck strain, wrist tingling). Growth, clothing changes, or new tasks (like standing desks) may require tweaks. Listen to your body! If you’re sore after a few hours, it’s time to reassess. A quick 5-minute reset can prevent long-term issues.
What’s the best monitor height for ergonomics?
The top of your screen should align with your eye level when sitting upright. If using a laptop, prop it up with a stand or stack of books. For dual monitors, center them to avoid neck twisting. Glare is a sneaky ergonomic killer! Adjust brightness/angle to reduce eye strain.
Why do I still feel pain after setting up ergonomically?
Pain might linger if you’re overcompensating (e.g., slouching to "test" the chair) or ignoring other habits. Try these fixes:
- Take micro-breaks: Stand, stretch, or walk for 2–5 mins every hour.
- Check your posture: Shoulders back, chin parallel to the floor.
- Rule out equipment issues: Is your chair’s lumbar support adjustable? Are your wrists straight?
Wrapping up and next steps
Creating an ergonomic workstation doesn’t have to be complicated—just 10 simple adjustments can make a world of difference for your comfort and productivity! 🎯 By prioritizing proper chair height, monitor alignment, keyboard positioning, and movement breaks, you’re investing in your long-term well-being. Start small, stay consistent, and soon your body will thank you!
Ready to take the next step? Test your setup today—adjust one thing at a time and notice how it feels. If you’re eager to dive deeper, explore ergonomic accessories or even a quick posture-check app to keep you on track. Your future self will high-five you for it! ✨